The ieeg.properties File
What this page tells you
Create an ieeg.properties file in your cnt1 home directory (ssh cnt1, touch ieeg.properties) with base_dir, url, username, password, and threads=5, so you can upload to ieeg.org. Test with ./ieeg size 'Study 005' in ieeg-latest; expect 3.438GB.
How to Create an ieeg.properties File
This file is necessary in order to be able to upload to ieeg.org
Helpful link:
- Go to your home directory with these codes:
- In Mobaxterm in the VDI, enter the cnt1 server with this code: ssh cnt1
- Then enter your home directory with this code: cd /home/pennkey
- In your home directory (denoted by /~), create a file called ieeg.properties with this code:
- touch ieeg.properties
- cd /project/eeg_process
- cd programs
- cd ieeg
- cd ieeg-latest
- Edit the properties file to look like the image below, replacing the <> sections with your information
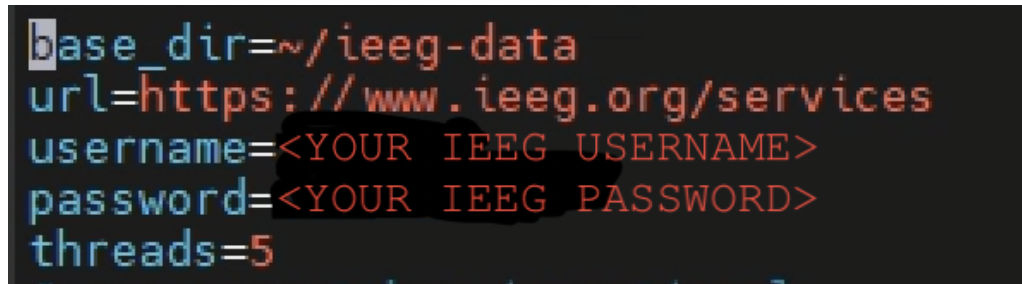
base_dir=~/ieeg-data
url=https://www.ieeg.org/services
username=my_username
password=my_password
threads=5
# aws_secret_key is optional
aws_secret_key=AWS_SECRET_KEY
4. To Save: *skip this step
1. Hit **escape** key
2. Then **:w**
5. To Quit: *skip this step
1. Hit **escape** key
2. Type **:x**
6. When you eventually upload to ieeg.org for the first time, an ieeg-data folder will also be created in your ~ directory, meaning everything is functional for your account
TO TEST THE INSTALLATION:
- In ieeg-latest, run: ./ieeg size 'Study 005'
- If you created your directory successfully, then you should get an output: 3.438GB